Showing posts with label Baking. Show all posts

Friday, January 06, 2012

Cookies!

Yesterday we made p-nut butter cookies! 

At the end of our dough, Audrey thought we should have one 
GIGANTIC 
one instead of three regular sized ones!
Makes good sense to me!

Friday, December 09, 2011

Catching Up...

Hi, thought I'd give you a little "catch up with pictures" post!
Enjoy!

~♥~

My Dad's birthday was the day before Thanksgiving. 
Audrey & I went to my Mom & Dad's to help with the meal and 
give Dad his coconut creme pie!

~♥~

Audrey's crazy "hand" person!

Wearing Hyacinth's (her BJD) wig!

~♥~

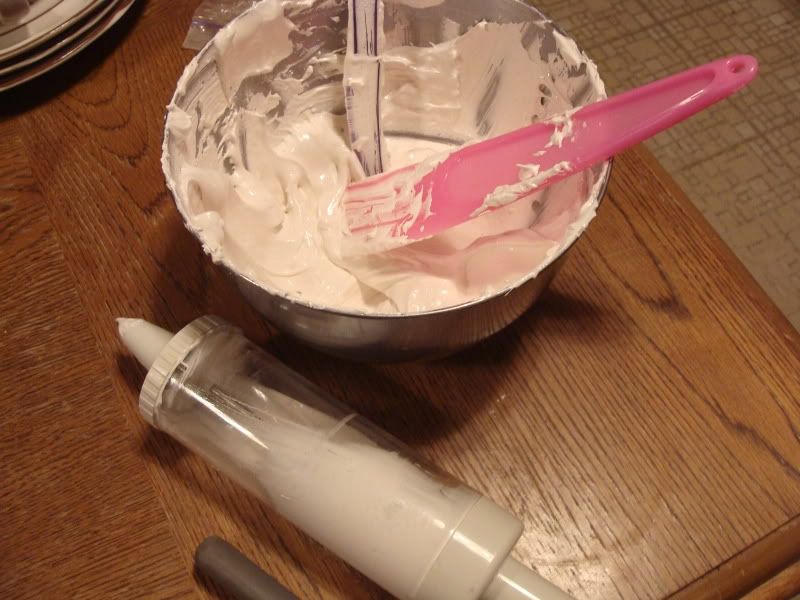
December 1st was Rudy's birthday! His cake was a work of love!
Audrey took these red, pink, white & blue heart sprinkles...

and picked out all the white & blue!


His cake was blue swirled.

She even stuffed a tiny pocket full of little white heart sprinkles 
(and Rudy got that piece of cake!!)!

Beautiful and delicious!


~♥~

Hope you enjoy this quick little update!

Tuesday, January 18, 2011

Chocolate Treats!

Doesn't it look yummy?
Guess what's on the bottom?


Yes, that's saltine crackers!
With these simple ingredients:
1 sleeve of crackers 
stick of butter
1 cup of brown sugar
2 cups of chocolate chips (I used semi-sweet)
You can make the world's easiest candy  


Lay one sleeve of Saltines out on a cookie sheet (you might want to spray or grease the pan first). I don't have a cookie sheet with sides, so I used my stoneware bar pan.


Melt one cup brown sugar and one stick of butter in a saucepan on the stove over medium heat until a gooey mixture forms.


Pour this mixture over the saltines and spread around with a spatula to generously coat them.

Stick the pan in the oven on 350 degrees for around five minutes until the brown sugar mixture is bubbling on the crackers.


Pull out of the oven and pour two cups of chocolate chips over the crackers and let them sit for a few minutes until they are starting to melt.


Spread the melted chocolate chips evenly over the crackers and then stick in the freezer for around an hour (until chocolate hardens). With my stoneware I had to wait till pan was cool so stoneware wouldn't crack.


Once chocolate is hardened, lift off the cookie sheet with a metal spatula and break into pieces.

I saw these at Outside the Box after Christmas. She made them for neighbors. They would make wonderful gifts for family & friends!

When not eating them...keep in the freezer!

** Caution - They are addicting **

Friday, December 31, 2010

Sugar Cookies (for cookie cutters or a cookie press)

The Sugar Cookies from my Childhood
3/4 cup butter/shortening (I did 1/2 and 1/2)
1 cup sugar
2 eggs
1/2 tsp. flavoring (I have used vanilla, almond & lemon)
2 1/2 cup flour
1 tsp baking powder
1 tsp. salt

Mix dry ingredients together, set aside. Mix the shortening/butter, sugar, eggs and flavoring till well blended. Blend in dry ingredients until dough comes together in a ball.

For cookie press:
Press dough onto ungreased cookie sheet bake at 400º oven for 6-8 minutes.

For cookie cutters:
Chill dough at least 1 hour. Roll to 1/8" thick cut out with favorite cutters. Place on ungreased cookie sheet bake in 400º oven for 6-8 minutes. 

Yields 4-6 dozen cookies


  ~oOo~

Homemade Colored Sugar
1 cup granulated sugar
food coloring

Put sugar in airtight container. Add 3-4 drops of food coloring and shake vigorously several minutes. You can use gel and paste food coloring by adding it to water first.


Friday, December 17, 2010

Do Your Kids Like Corn Dogs?

Most kids like corn dogs! You can get them at a carnival or fair. Usually deep fried in oil. You can also find recipes to make them at home. Dipping in the batter, frying in oil... Or,


Make this muffin version, it's so much easier. I used our corn muffin (Jiffy copycat) mix, added diced hotdogs, and bake.

They're "stickless" corn dogs! 

Tasty!

Give them a try, let me know what your kids think!

Friday, December 03, 2010

Pumpkin Pie Spice Meringues

Audrey had said on her blog here, that she wanted to make these

Well, they were delicious!

Pumpkin Pie Spice Meringues:
1 cup granulated sugar
3 egg whites
1 tsp of vinegar (or cream of tartar. Either one works)
1 tbs pumpkin pie spice (cinnamon, nutmeg, cloves, ginger)
Tiny dab of orange food coloring (we didn't use this)

Preheat the oven to 200 degrees Fahrenheit.

Whip the egg whites until frothy, then slowly add in the sugar.
Then add the vinegar and spices, and continue to whip.
When it gets to soft peaks, add in the food coloring.
Whip whip whip whip whip until they're stiff, glossy peaks. (they'll hold their shape when you lift the whisk straight up, the tip should curl over , but it should be a defined peak)

You can either just put the meringue into a sandwich baggie and cut the tip off and pipe little blobs, or put a nice tip in a pastry bag. We used my Pampered Chef Easy Accent Decorator
Ours were about the diameter of 50 cent pieces.

The baking time will depends on your oven and the size of the meringues. They needed about 2 hours. Generally, they'll take between 1 and 2 hours, but it does depend on their size, and your particular oven.


Photobucket


They were delicious, almost like pumpkin pie!

Wednesday, December 01, 2010

The Birthday Celebration!

Rudy woke this morning to this loving birthday wish...

and this! It brought a big smile to his face!

Audrey taste testing her homemade maple buttercream frosting for her daddy's cake. (It was delicious)

Audrey decided on a square first layer and a smaller round second layer.

That's a lot of candles!


She gave him the whole top layer!

Rudy got homemade cards,
from Audrey


& me!


He said he had a wonderful day!

So glad you did honey, we love you!


Friday, November 26, 2010

Turkey Leftovers

Want an easy recipe for your Thanksgiving turkey leftovers? 

I'm sure you probably have a recipe for a turkey/chicken potpie! However this one is super simple and really uses whatever you have on hand.

  • approx. 2 cups of mixed vegetables (I used veggies from my frozen veggie bowl (peas & corn), lima beans, 2 small potatoes and a carrot (I steamed the raw veggies in the microwave before adding to the potpie)
  • can of cream soup (usually I use cream of mushroom or celery, but I only had cream of potato. Was fantastic!)
  • leftover turkey
  • your favorite seasonings (I usually use Oregano, garlic powder, salt & pepper to taste, but the leftover peas were 'basil peas' so I just added Thyme, garlic, salt & pepper)
  • can of biscuits (Audrey rolled 2 of the large biscuits together for our individual 'pies' placed over our filling). Cut vents in the top. I have also used homemade biscuits dropped onto the filling, cornbread and the copycat Jiffy corn muffin mix for the top of the potpies.


Bake in a 350 degree oven for 20 to 25 minutes, or until golden brown. 

They were very yummy, & aren't the individual 'pies' so cute?

Tuesday, October 26, 2010

Copycat Jiffy Corn Muffin Mix

When I think about corn bread, I think of white corn meal, and a wrought iron skillet with some wonderful southern style cornbread. Many think of the sweet yellow corn muffin mix that comes in the little 8.5 ounce boxes "Jiffy Corn Muffin Mix". 


I love Jiffy cornbread too. It's just not "cornbread" (some know what I mean *wink, wink*).

Well I found this copycat "Jiffy" corn muffin mix. It's delicious and tastes like that sweet corn muffin mix. 

INGREDIENTS
2/3 cup all purpose flour
1/2 cup yellow corn meal (I use white corn meal)
3 Tbsp granulated sugar
1 Tbsp baking powder
1/4 tsp salt
2 Tbsp vegetable oil
1 egg
1/3 cup milk

INSTRUCTIONS
The linked instruction have you add the egg & milk after mixing all the other ingredients. Since I'm making mine immediately I just mix all my ingredients together at the same time. (For the above pictured Pyrex dish I double the recipe)

Mix well with whisk.

I pour the mixture into a greased 9 x 9 pan.
Preheat oven to 400 degrees F. 
Bake 15-20 minutes

If you wish to make Corn Muffins:
Fill muffin tins 1/2 full. Bake 15-20 minutes.
Makes 6 muffins.

Monday, April 19, 2010

Hot Pockets

Have you had Hot Pockets the frozen pocket sandwiches you heat in the microwave. Well here's a super easy homemade version I'm sure you'll love too.

Ingredients needed:
2 oz (1/4 of 8-oz pkg) cream cheese, solftened
1 Tbsp. mayo or Miracle Whip (I have used ranch salad dressing)
1 tsp. mustard 
4 slices of deli meat (or about a cup of diced); for today's I used sliced ham
1/4 cup shredded cheese; for today's I used cheddar
1 can refrigerated biscuits (I use the store/generic brand of the "Grands" biscuits)


Follow directions on the biscuit container for oven temperature and baking time.


Dice the meat,


add to the softened cream cheese,


here's Audrey shredding the block of cheddar,
and add to the ham & cream cheese mixture.


Now add the rest of the ingredients 
(except for the biscuits) to the mixture, and mix well.

Press biscuits into 4" circles,  

place spoonful of mixture to one side of the pressed biscuit,


fold biscuit over and press the seams closed. 

Place into preheated oven and bake until golden brown.


Then enjoy!


The possibilities are endless...

  • ham & swiss 
  • turkey & american cheese
  • roast beef & provolone
  • a hamburger pocket: ground beef & american 
  • a pizza pocket: filled with your favorite pizza toppings
  • how about a breakfast pocket: scrambled egg, sausage or bacon 
  • or a vegetarian pocket with all your favorite veggies


Just replace the meat & shredded cheese with your favorite choices. You can also change the condiments (the mayo & mustard) with pizza sauce, salad dressing, etc.